Welcome, Guest. Please Login or Register
Decware Audio Forums
03/28/24 at 15:51:40 


Pages: 1
Send Topic Print
Placement of WO 12" in car - + initial build (Read 7615 times)
Stroker-Porsche
Ex Member


Placement of WO 12" in car - + initial build
12/05/11 at 05:33:02
 
First thanks to Decware for making the plans free and also to all who have already posted, I learned a lot and actually found the guts to attempt this myself.

I have built a 12" WO moch up box.  Two 12" AB subs, nothing special.  I have a Rockford Fosgate 12" dual 2ohm HX2.  Just found another.  When it comes in I will build another WO for it.  I also need to get a table saw.  Had to use lots of glue and sealer on this initital try.

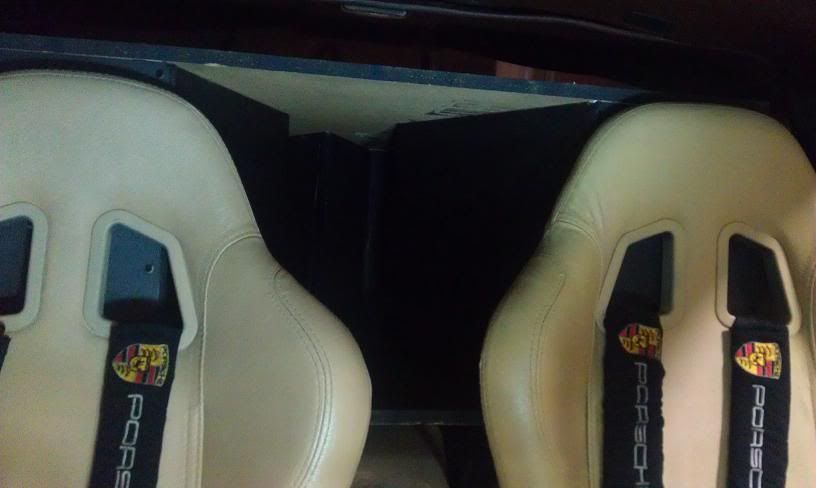
My main question is which direction to face it.  I have a hatchback.  Right now the WO only fits resting against the front seat backs.  This gives about 1/4" clearance to the hatch glass, and about 18" to the back of the car.  It can't slide back farther due to the angle of the glass.  Also for safety I wanted it up front so I could secure it to the roll bar with additional weld in brackets at the rear.  It also has to come out easily on track days.  Right now I have it facing forwards, which of course looks cool with the vent right at ear level between the seats. Might hang a styrofoam core mirror ball in the vent... Roll Eyes

However with the longer throw of a horn would I be better off shooting it towards the back?

I am using 2 Cadence XAH250.2 amps to drive the subs, one on each sub.  Both amps are rated 500w RMS bridged into 4 ohms.  The AB 12s are single coil 4 ohm speakers.  The RF HX2s will be 4 ohms with the dual 2 ohm coils in series. Best I can tell Sealed area is 1.15Cuft after taking out the speaker displacement.  It will be a tad less with the RF HX2 which have a larger magnet structure.


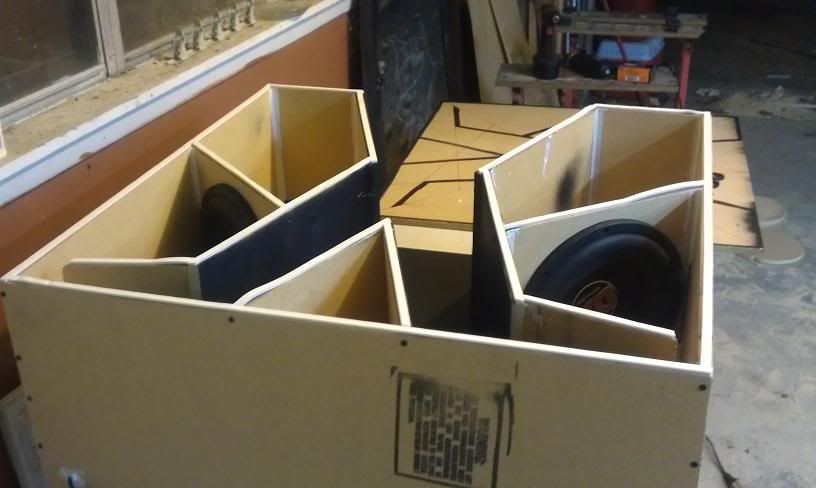
Couple pics.  Again, no table saw, and not much in the way of wood working skills.  Now give me a wrench and it's a different story.. Grin

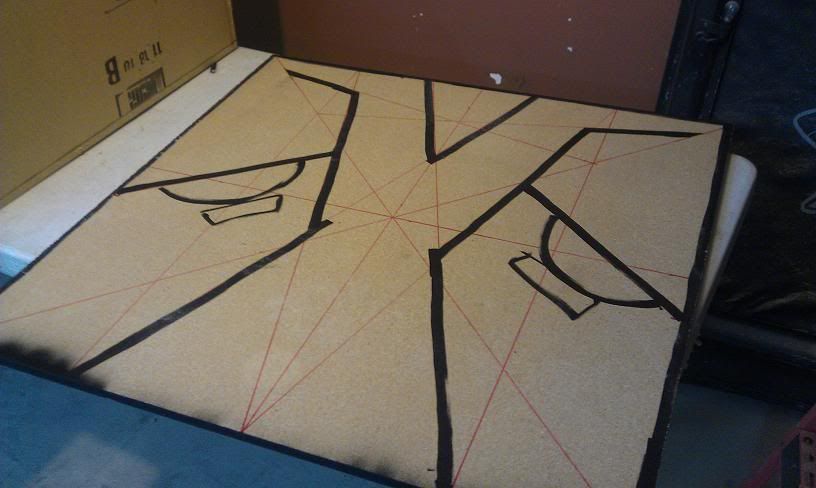
Laying out the pattern.


Subs in.  


Weather strip


Drew pattern on lid and marked walls in black for screw placement.


Lid on, starting the screws.  Went one screw every 1.5" to be safe on top. Every 2" on bottom.


And the car I'm squeeeezing it into...


Current location of WO and vent right behind driver's seat.


Incase my question got lost in the posting..
With the longer throw of a horn would I be better off shooting it towards the back?

Thanks for any help!
Back to top
 
 
  IP Logged
ZYGI
Seasoned Member
****


HR-ONE

Posts: 757
Re: Placement of WO 12" in car - + initial build
Reply #1 - 12/06/11 at 12:38:09
 
S-P, the only way to know for sure is to try it. My thought is if the sub box just clears the glass in the back it may just trap the bass back there, but I could be wrong.

It looks like you built the 36" X 36" version, if you were to build it again like you say you want to, build the 24" X 36" version and shrink the height down as close as you can get to the driver size. This will allow you to get it farther back under the glass and get the port farther away from the seat back and let the sub breath a bit better. In some cases bigger is not always better.

I also noticed the first joint from the mouth has a protrusion at the joint overlap, this should be smooth. It could just be the picture though.
'

ZYGI
Back to top


All Decware amps and sources, Turning Point Audio speakers
  IP Logged
Stroker-Porsche
Ex Member


Re: Placement of WO 12" in car - + initial build
Reply #2 - 12/07/11 at 02:32:19
 
Thanks.  I tried drawing out a 36x24 first but could not fit the 12" wooded diameter in the baffle.  I will look at it again.  I can cut down the height to we" even if I cut a shallow groove for the outermost edge of the subwoofer.   Though the support baffle would be very thin on the top and bottom.

Oh and yes, the joint is messed up.  Getting a table saw before i build a final version.
Back to top
 
 
  IP Logged
ZYGI
Seasoned Member
****


HR-ONE

Posts: 757
Re: Placement of WO 12" in car - + initial build
Reply #3 - 12/07/11 at 12:21:23
 
FYI you can build it any size between 24"-36" so if you need to add a bit to the 24" to make it work, go for it.  But you really don't loose a lot of width with the 24" version, just depth.

As far as the baffle being thin top and bottom... it should be a double baffle, not single.  On the bottom, with the bottom screwed and glued its as strong as you would ever need it to be. On the top, it regains its strength once the top as attached. The only thing to remember is to space your screws so they are not in the center of the of the of the driver hole, so you don't run a screw into your driver.

ZYGI
Back to top


All Decware amps and sources, Turning Point Audio speakers
  IP Logged
Pages: 1
Send Topic Print