|
OFFICIAL WEB SITE

MODEL
DBK-212
Transmotional High
Output Bandpass Box
for one or two
12's.

THIS COULD BE YOU -
BUILDING A BOX THAT'S TWICE AS GOOD
as anything you can buy at the store - for
a fraction of the cost.
GET THE PLANS NOW FOR
$19.95
 Instant Download
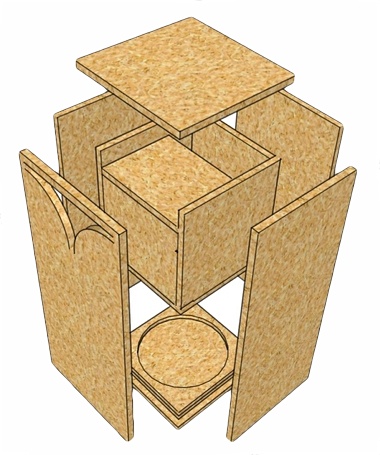
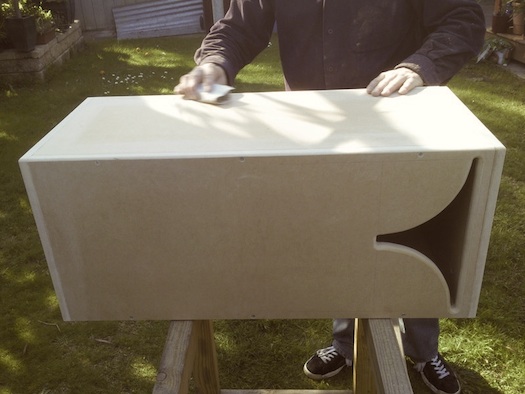
Exploded
View of DBK-212
Size 14" x 14" x 32"
SEE
MORE BOX DESIGNS HERE
|
INTRODUCTION
NOTE: Works
with 1 or 2 twelve inch
woofers.
This
is the correctly designed way
to scale up our famous 10 inch
Deathbox for use with 12 inch
woofers. As you can see
it is not scaled at all, but a
different design using the
same technology. This
maintains the killer ratio of
Size vs. Bass Output that
makes the design so
successful. The
difference between this 12
inch Deathbox and the 10 inch
is increased low bass
extension and SPL. After
all if you're going to try to
scale up a 10 inch Deathbox
you have to get something in
return for that extra space!
Like
it's little brother, the new
12 inch Death Box is easy to
build. It has a self
sealing removable access lid
eliminating the need for
gaskets. Designed for
single or compound loading of
12 inch subs, it features a
removable insert making it
easy to install the woofers,
and tune the box.
And of course don't forget,
the DBK212 will work with most
car audio 12" sub-woofers* and
can be tuned AFTER BEING
PLACED IN YOUR CAR!
*Free-air
woofers excluded
|
PERFORMANCE
MAX:
Bass from 14x14x32 inches of
space.
For
those of you who are not
familiar with this box design,
it is quite simply the most
quality bass you can get from
this amount of space (14x14x32
inches). It fits in trunks
and hatch backs with ease, but
more importantly it works
anywhere you can make it fit!
Unlike boxes that sound OK in
the garage and then have no bass
when installed in your car, the
DBK-212's self loading design
ensures serious low frequency
output in literally every
vehicle you can cram one into.
Besides great frequency balance
and extra low bass, this box can
be tuned to sound the way
you want it via a movable baffle
assembly. You just try it
in different positions during
your install and pick the one
that hits the hardest!
The design also works with the
majority of car audio subwoofers
designed for small ported or
sealed boxes. It doesn't care if
it's a Rockford, MTX, Apline,
Polk, or any other brand of
woofer. It just works.
Like the original ten inch
version, this Deathbox will more
than double the power handling
of whatever woofer you put
inside it. In fact, the
technology that makes this box
so devastating is explained
rather well on the DBK10
Deathbox video below.
Remember, this Deathbox is just
a larger version of the DBK10 so
all of the technology that makes
them work is the same.
|
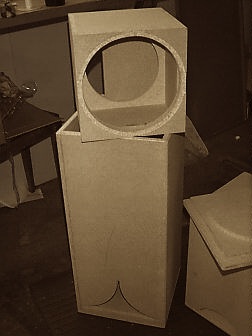
Model DBK-212
TRANSPARENT VIEW
REMOVABLE BAFFLE ASSEMBLY
can be slid up and down inside the box
letting
you tune it by ear while music plays.
The left picture shows the DBK-212 with
the lid removed and removable baffle
assembly
(called the insert) turned on its side and
set on top of the cabinet.
|
HOW TO BUILD
ONE YOURSELF
This
design also works well in
the home for either
audiophile use where speed
and accuracy are a must
have, OR for movies where
these same qualities just
make everything sound more
real!
- SKILL
LEVEL: This is an easy
box to build provided
you have a good table
saw and can make
accurate cuts.
- TOOLS
NEEDED: Besides a table
saw (with sharp blade)
you will need clamps,
carpenter's wood glue, a
sander (belt sanders
work well) and a drill.
- WOOD
NEEDED: The box can be
built from less than one
sheet of 48 x 96 inch
plywood, MDF or high
density particle board.
Below is a cut-sheet
illustration showing how
each panel should be
laid out for cutting:
- TIP
The trick to assembly
is to construct the
insert first.
Then wrap the side
panels around the
insert and install the
bottom panel.
This way the insert
will move inside the
box with a perfect
fit.
- SCREWS
are typically only
used to fasten the
removable top (lid) so
that the woofer can be
accessed. If you
properly build the box
with wood glue and
clamps, nails are not
needed as the glue
becomes stronger then
the wood itself.
If you have an air
nailer, you can use 2
inch finish nails to
hold the panels
together in place of
clamps while the glue
dries.
- FINISHES:
The most common way to
finish this cabinet is
to paint it.
There are tons of
finishes available
that can make the box
look like anything
from rock, to
marble. Also you
can use real wood
veneer for a
completely
professional look in
the house.
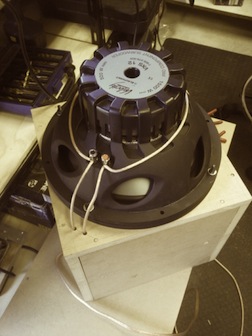
- WOOFERS:
The design makes it
compatible with 100's
of different 12 inch
car audio woofers that
work in smaller
boxes. Even an
inexpensive woofer
will see double it's
rated power handling
in this enclosure and
sound great doing it.
- JOINERY:
The quality of your
cuts determines the
joinery or fit of each
panel. Quality
joinery is a major
part of the distortion
free performance of
this box.
- WIRING:
Since this box can be
pointing in any
direction other then
face down, no official
back or front have
been defined. We
recommend soldering a
pair of stranded 16
AWG copper wires to
the woofer terminals
and run the wire out
through the port
opening. Make it long
enough to connect
directly to your
amp. If you
decide to hide the
wire, you can drill a
small hole through one
of the sides of the
box and seal the wire
with caulk where it
passes through the
hole. Terminal
cups leak air and are
not recommended.
|
SEE
MORE BOX DESIGNS HERE
|