|


|
Below are the 12 steps to repairing the foam
edge (surround) on a speaker. This example is using a 12 inch woofer
being repaired with our G12F re-edge kit.
|
|
|
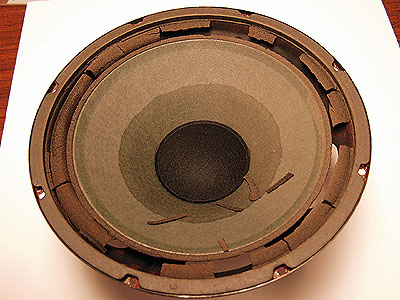
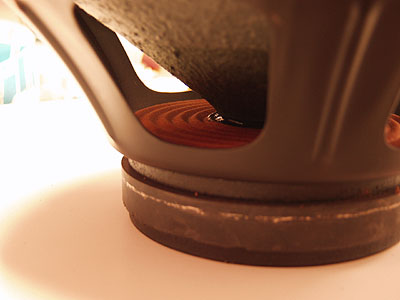
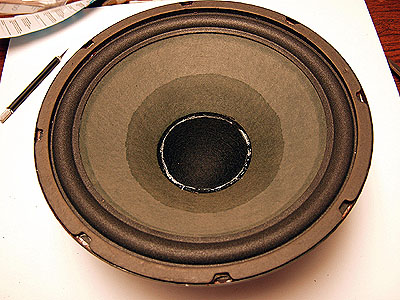
STEP ONE
Here is what it looks like before we do
anything to it. The rotted foam edge needs to be removed so that
you have clear access to the inside edge of the cardboard gasket.
Just scrape it away with your fingers. Then take a razor
knife and slowly separate the gasket from the steel frame. This
takes several passes with the knife so be patient.
NOTE: Most of our kits come with replacement
gaskets so you don't have to try and preserve the originals.
|
|
|
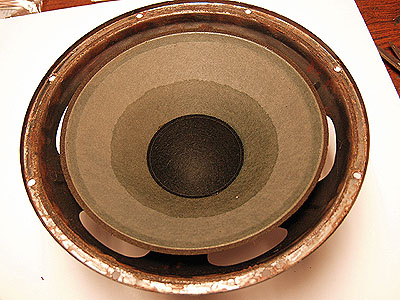
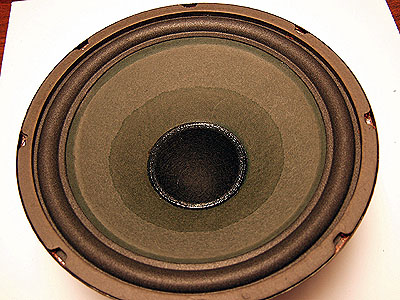
STEP TWO
After you have removed the gasket you can
clean the steel frame with either a wood chisel or small putty knife.
It's okay to have a glue residue on the frame, the objective is
to get a smooth even surface. You can also take your small razor
knife and carefully scrape away the foam residue from the speaker
cone's outside edge. Same objective.
|
|
|
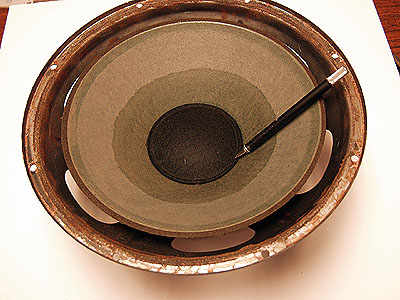
STEP THREE
We need to remove the dust cap so we can shim
the voice coil. Use your knife and while keeping the blade
parallel to the speaker cone, slowly cut around the circumference of
the dust cap. Stop before you reach your starting point so that
you leave a small portion un-cut. This will act as a hinge
allowing you to flip the dust cap out of the way and then later put it
back.
|
|
|
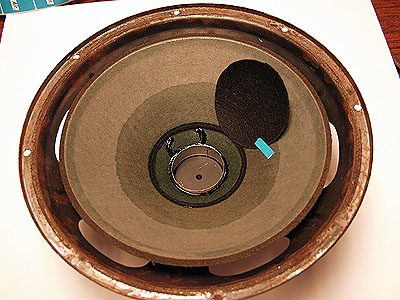
STEP FOUR
Take a small piece of tape and secure the dust
cap up out of the way.
Note it is still attached by the small portion
you left uncut.
At this point the voice coil is now exposed so
it is important not to get any debris in it.
|
|

|
STEP FIVE
The objective is to install between 3 and 4
evenly spaced paper shims in the gap between the voice coil bobbin and
the steel pole piece inside it. You want the fit to be snug so
that the cone doesn't move up and down easily but in fact stays where
you put it.
There is no one shim thickness that works on
all speakers. Every speaker is different. You can cut shims
from magazine covers, or business cards.
|
|
|
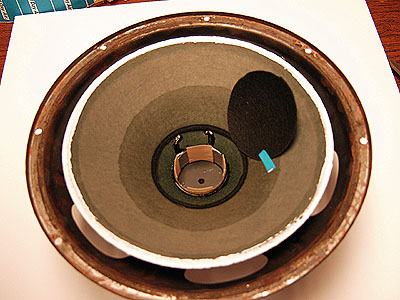
STEP SIX
The orange disc you see is called a spider.
Together with the foam surround it keeps the voice coil centered around
the steel pole piece. It also contributes to the woofers
compliance - or stiffness. This spider should be flat. Many
times on older speakers it has begun to sag towards the magnet.
When you shim your voice coil set the cone position so that this
spider is flat.
|
|
|
STEP SEVEN
Now put an even layer of the white
speaker glue around the circumstances of the speaker cone as shown.
Also place a thin even layer on the inside edge of the new foam
surround. Use you finger to smooth the glue out on both surfaces.
Now join the foam surround to the cone by carefully placing
it on the glue joint and gently pressing it down. Do not try to
slide, pull, or stretch it in any way. As it dries continue to
press down where needed.
|
|
|
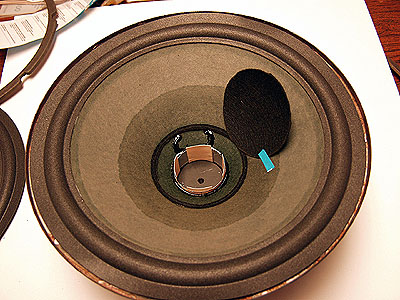
STEP EIGHT
After you first glue joint is completely dry
apply a thin layer of glue to both the steel frame and outside lip of
the foam surround. Carefully press the surround to the frame.
Do not attempt to pull, stretch, slide, or move it in any way.
Simply let it attach itself exactly where it
falls. It likely will not be centered in the steel frame, most
woofers aren't. Continue to press down until dry. You can use the
gasket to help hold it down.
|
|
|
STEP NINE
Once the glue has dried you can re-attach your
gasket by covering the back side with an even layer of glue. Once
it is in place you can lay a board on top of it to hold it down or flip
it over on the table and let it dry.
NOTE: The gasket for this woofer is a
one-piece and was the original gasket. You can replace it with a
inter-locking 4 piece gasket (new) that comes in your kit if you want.
|
|
|
STEP TEN
After all the glue is dried it is time to
remove the shims and check for center. Gently push down on the
cone in various spots and see if the voice coil rubs anything as it
moves. If not, your repair was a success. If so, you'll
have to start over.
After you have tested center, place a thin
bead of glue on the dust cap and flip it back down into place.
Let it dry.
|
|
|
STEP ELEVEN
The final optional steps are called "dressing"
the repair. Apply an even layer of glue to both areas shown.
Use your finger to smooth it out. This is best done with the
woofer on a turn-table or something that you can slowly spin.
|
|
|
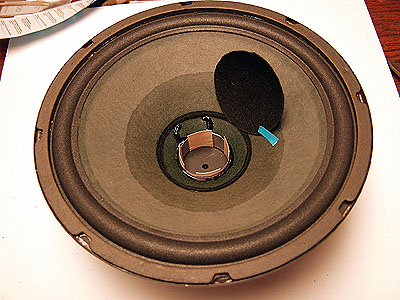
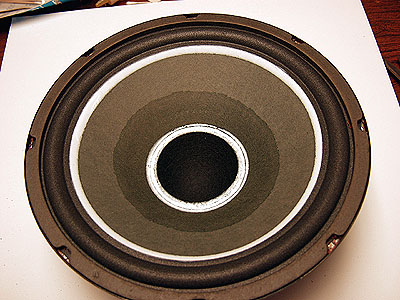
STEP TWELVE
The last step is to admire your work. As
you can see the white poly-acrylic glue dries clear making your repair
hard to detect.
These polyether surrounds will last much
longer then the original polyurethane that you replaced.
Give your woofer a few hours of playing time
for it to break-in and enjoy another 25 years of service from it.
|
|
Our kits come with 2 new polyether foam
surrounds, new cardboard gasket sets, paper shims, our special
poly-acrylic adhesives, applicators and instructions. We can also
supply new dust caps.
|
CLICK HERE FOR OUR REPAIR KITS
Decware is a trademark of High Fidelity
Engineering Co.
Copyright ©
1996~ 2010 by Steve Deckert
|